
WordPress Malware Removal: What to Do After Your Site Is Hacked
A step-by-step guide to identifying, removing, and recovering from WordPress malware — and closing the vulnerability so it doesn't happen again.
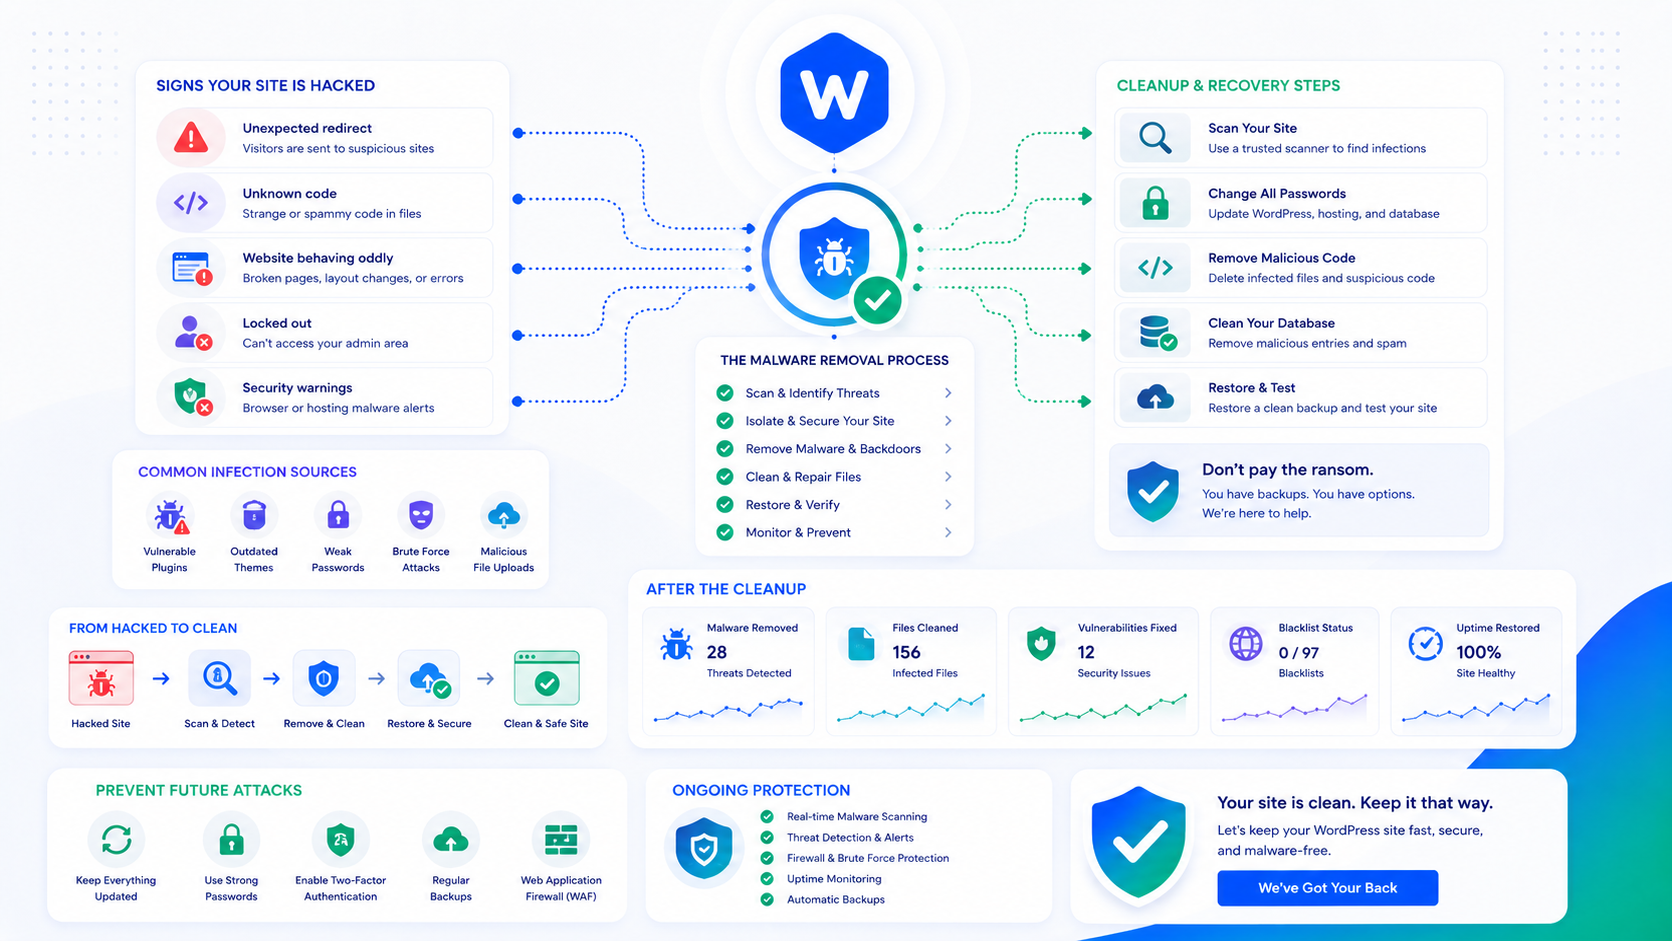
Discovering your WordPress site has been compromised is unsettling. The instinct is to act immediately and fix everything at once. The better approach is methodical: understand what happened, contain the damage, clean thoroughly, and close the entry point before the site goes back online. Cleaning a compromised site without finding how the attacker got in guarantees reinfection.
This guide covers the incident response process in order, from the moment you suspect a compromise through recovery and hardening.
Recognizing a compromise
WordPress compromises don’t always announce themselves. Common indicators:
- Visitors see malware warnings — Google Chrome’s “This site may harm your computer” or Google Search Console security alerts
- Your host suspended the account — many hosts automatically suspend sites flagged for sending spam or serving malware
- Unexpected redirects — visitors are being sent to spam sites or phishing pages
- New admin users you didn’t create — a common persistence mechanism
- Modified core files — WordPress core files have been edited to inject code
- Search results show unexpected content — spam pages indexed under your domain (Japanese keyword hack, pharmaceutical hack)
- Site is slow or consuming excessive server resources — cryptominers and spam scripts run in the background
If any of these appear, treat it as a confirmed compromise until proven otherwise.
Step 1: Take the site offline immediately
Before doing anything else, take the site offline or restrict public access. A compromised site actively serving malware to visitors is spreading the damage. Your priority is containment before cleanup.
Options:
- Enable maintenance mode through your caching plugin or a dedicated plugin
- Add an
.htaccessrule to block all traffic except your IP:Deny from allwithAllow from your.ip.address - Contact your host to temporarily suspend public access while you work
Notify your team and any stakeholders that the site is offline for security maintenance.
Step 2: Restore from a clean backup if available
If you have a backup from before the compromise, restoring it is the fastest and most complete path to a clean site. Check your backup timestamps — you need a backup from before the infection, not one that includes compromised files.
Before restoring:
- Download a copy of the compromised site for forensic analysis (to identify the entry point)
- Restore to a staging environment first and confirm the backup predates the infection
- Restore to production
After restoring from backup, you still need to close the entry point or you’ll be compromised again within hours. Continue to Step 5 after restoring.
If no clean backup is available, or if you need to understand what happened before restoring, continue with the manual cleanup process.
Step 3: Scan and identify malicious files
Multiple scanning approaches used together produce the most complete picture.
WPScan — scans your WordPress installation for known vulnerabilities, weak credentials, and exposed sensitive files:
wpscan --url https://yourdomain.com --enumerate p,t,u
Wordfence (plugin) — scans WordPress files against known clean versions, flags files that have been modified, and identifies known malware signatures. The free tier includes scanning.
Maldet (Linux Malware Detect) — command-line scanner for web server malware patterns:
maldet --scan-all /var/www/yourdomain.com/
Manual file integrity check — compare your WordPress core files against the official release. The checksums for every WordPress version are published at api.wordpress.org:
wp core verify-checksums
This flags any core file that doesn’t match the official release. Every flagged file is either maliciously modified or an unrelated customization.
Review scan results carefully. Scanners produce both true positives (actual malware) and false positives (obfuscated but legitimate code, encoded plugin files). A result that’s flagged as suspicious but is a known legitimate plugin file doesn’t need to be deleted.
Step 4: Remove malicious code
Replace WordPress core files. For any core file flagged by wp core verify-checksums, replace it with a clean copy from the official WordPress download. Don’t try to surgically edit infected core files — replace them entirely.
wp core download --skip-content --force
Remove unknown or modified plugin and theme files. For each installed plugin and theme, compare against the official version. Any unexplained modification is suspect. For plugins from the WordPress repository, reinstall from the repository:
wp plugin install plugin-name --force
For premium plugins and themes, download a fresh copy from the vendor and replace.
Identify and delete injected backdoors. Attackers commonly install backdoors — PHP files that give them persistent access even after the initial vulnerability is patched. Common locations:
/wp-content/uploads/— executable PHP files should not exist here; any.phpfile in uploads is suspicious/wp-content/— hidden files with random names- Modified plugin files with base64-encoded
eval()calls
Search for common backdoor patterns:
grep -r "eval(base64_decode" /var/www/yourdomain.com/ --include="*.php"
grep -r "FilesMan" /var/www/yourdomain.com/ --include="*.php"
grep -r "c99shell" /var/www/yourdomain.com/ --include="*.php"
Review user accounts. Check wp_users for accounts you didn’t create. Delete any unauthorized admin accounts. Review all existing admin accounts and reset their passwords.
Check wp-config.php and .htaccess. Both files are common injection targets. Compare against a known clean version. Look for added eval() calls, added redirect rules, or modified database credentials.
Step 5: Find and close the entry point
This is the step most site owners skip when they’re in a hurry to get back online. Cleaning malware without closing the entry point is temporary — the same attacker (or an automated tool) will use the same vulnerability again, typically within 24 hours.
Common entry points:
Outdated plugin or theme. Cross-reference your installed plugin and theme versions against WPScan’s vulnerability database for the date of the compromise. A vulnerability disclosure + your site running the vulnerable version is a strong indicator.
Compromised admin credentials. Check your server logs for the IP addresses that accessed wp-admin before and during the compromise. Credential stuffing attacks often show up as a rapid series of failed logins followed by a successful one.
File upload vulnerability. If a plugin allowed unauthenticated file uploads, the attacker may have uploaded a PHP shell. The malicious file’s location and timestamp give you the timeframe to investigate.
Compromised server-level credentials. FTP, SSH, or cPanel credentials. If an attacker obtained server access directly, they bypassed WordPress entirely. Check your server access logs.
Identifying the entry point may require reviewing server access logs for the timeframe before the earliest signs of compromise. Look for unusual POST requests to plugin endpoints, unexpected file upload activity, or login events from unfamiliar IP addresses.
Step 6: Harden before going back online
With the site clean and the entry point identified and closed:
- Reset all credentials: WordPress admin passwords, database password, secret keys in wp-config.php, FTP/SFTP credentials, hosting account password
- Update everything: WordPress core, all plugins, all themes — to the latest versions, addressing any known vulnerabilities
- Review file permissions: Files should be 644, directories 755, wp-config.php 600 — see the file permissions guide
- Disable dangerous features: XML-RPC if unused, file editing in wp-admin, directory indexing
- Enable login hardening: Rate limiting, 2FA for admin accounts — see the login hardening guide and 2FA setup guide
- Remove unused plugins and themes: Every inactive plugin is a surface area; remove it
Step 7: Request a malware review
If Google flagged the site for malware and removed it from search results, submit a review request through Google Search Console after cleaning:
Search Console → Security Issues → Request Review
Google typically completes reviews within 72 hours. The site won’t reappear in search results until the review clears. If the review fails, additional malware or a residual security issue remains — repeat the scan and cleaning process.